Things you'll need:
- A PC Desktop or Laptop
- A Digital Camera
- The camera's USB wire
- Installation CD (Optional for most cameras)
Before you start: - The process below does NOT remove the pictures from the camera but instead copy's them. The pictures will remain on the camera after completely this tutorial.
- Make sure a memory stick is inserted into the camera before attempting the tutorial.
- Always perform the tutorial below with a battery level above 50%.
Camera Installation
In this article I'll be doing a step by step process about how to transfer photos from most cameras to a Windows XP or 7 computer, gather the necessary items (listed above) and begin by grabbing the USB wire and plugging into an open USB port in the front or back.Power on the camera just like you normally would and allow the computer a few minutes to install the drivers (making it detectable to the computer), the computer should make a noise notifying the completion. If no noise is heard a bubble confirming completion will also pop up in the bottom right.
(Optional step for CD Installation) If your camera came with a CD, simply follow the above steps and then proceed to insert the CD. Follow the step by step instructions on the CD.
Transferring the Pictures
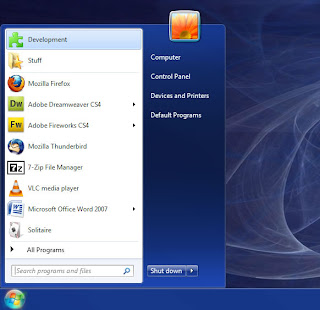
Now that the computer recognizes the camera we can begin taking the pictures from the camera and transfer them to the computer. We do this by firstly clicking on the Windows button in the bottom left of the screen.
You should see something similar to the picture on the left.
Next, click on the button marked "Computer" located somewhere in the list on the right side above the "Shut Down" button.
 |
If you don't see your cameras brand name the camera can be identified by the camera symbol.
 |
Select the option "Import pictures and videos".
To change the settings that are used when importing pictures and videos, click Import settings in the Import
Pictures and Videos dialog box.
Change one or more settings in the Import Settings dialog box, and then click OK
Click OK to restart Import Pictures and Videos. Type a tag in the Tag these pictures (optional) box, and then click Import to import your pictures and videos using the new settings.
DONE!
Fix: No Import pictures button
Some older camera's aren't compatible with the above tutorial. If your camera doesn't allow the options above proceed by using the option "Open folder to view files"Copy any pictures from the folders by dragging them to any location on your computer.
Congratulations, the tutorial is complete, now you can look at or edit the uploaded pictures at any time.
Written by:
Brandon Campbell
Give us a call:
775-741-8476
Book an Appointment Online:


No comments:
Post a Comment